One of my favorite things to do is non destructive (okay, minimally) mods that help integrate old equipment into modern environments. All environments should have an ARP 2600 in my opinion – I think its a perfect synthesizer and allows the user to learn all about synthesis while delivering powerful and amazing sound.
ARP 2600’s are difficult to use with your typical Midi to CV/Gate converter for 2 reasons.
1. In order to patch all oscillators to one CV source, you must use 4 cables and waste the only mult your panel offers you
2. To gate the 2600, you must provide a 12V or higher gate. The envelopes will not respond as intended to lower voltages. Kenton & others often add a 12V gate option, but we’ve found this to be somewhat unreliable as well, and could theoretically damage other equipment if you forget to set it back.
Lose The Keyboard Output Jack
Or repurpose it, rather. This jack is used to send the keyboard CV to other destinations. Certainly useful, but rarely used for its intended purpose. Its already permanently going to the filter where its generally most useful.
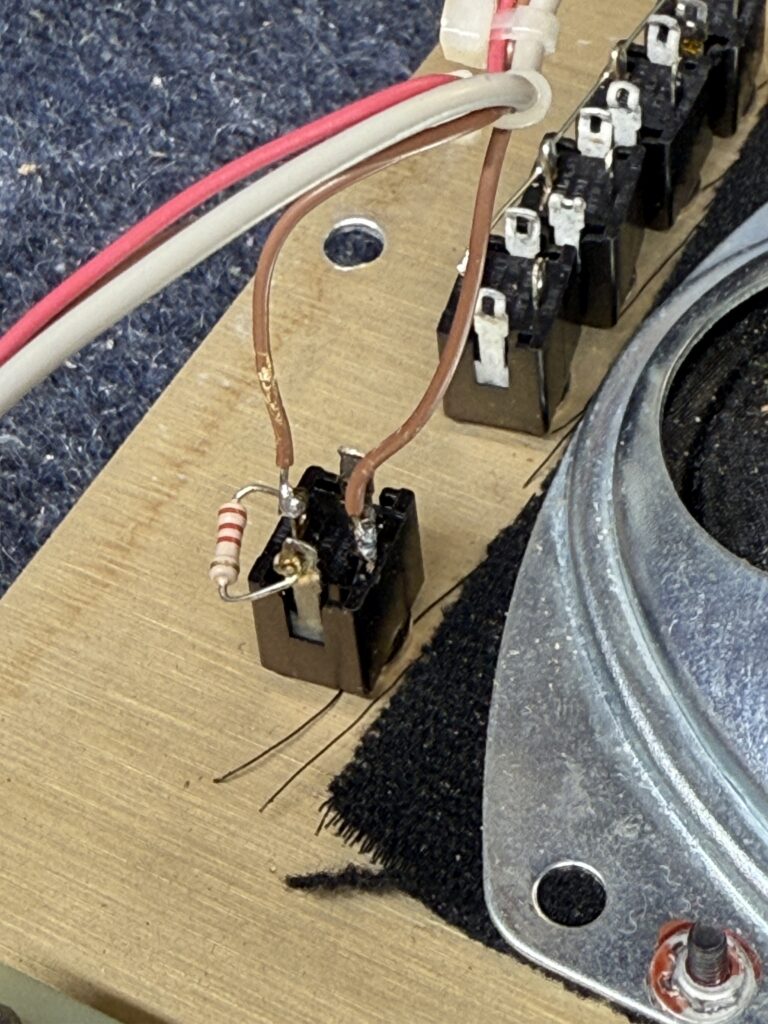
The jack itself has 2 brown wires going to the “tip” terminal of the jack. Part 1 of the mod is to simply separate the 2 brown wires.
The one coming from the jones connector on the side of the console where the keyboard plugs in should be soldered to the “shunt” terminal on that jack. The brown wire heading off to the oscillator board should be soldered to the “tip” terminal on the jack. Now, when you patch an external CV to this jack, it will disconnect the keyboard voltage and send the external CV to all 3 oscillators as well as the filter and lag generator.
Gate Boost
The 2nd part of the mod is to convert all incoming gates to much closer to 15V. We sell a cheap chiclet that does this for you here https://rosensound.com/products/arp-2600-gate-level-shifter-chiclet
Unfortunately this mod does involve a trace cut, but if you do it right, you can always reverse it by just passing a bit of solder over the foil.
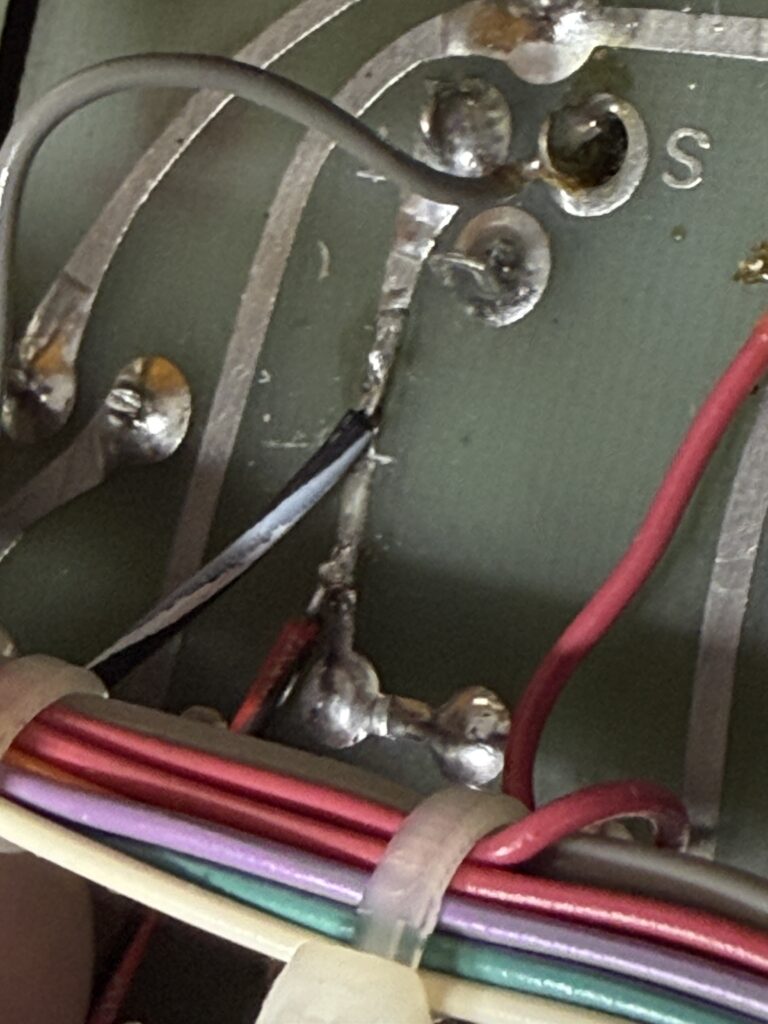
In the photo above, you should notice the light cut beneath the black/white wire. This is done to the S&H Gate jack circuit. This was done with a new xacto knife. Repairing this would be easy with a dash of solder if you ever wanted to reverse this.
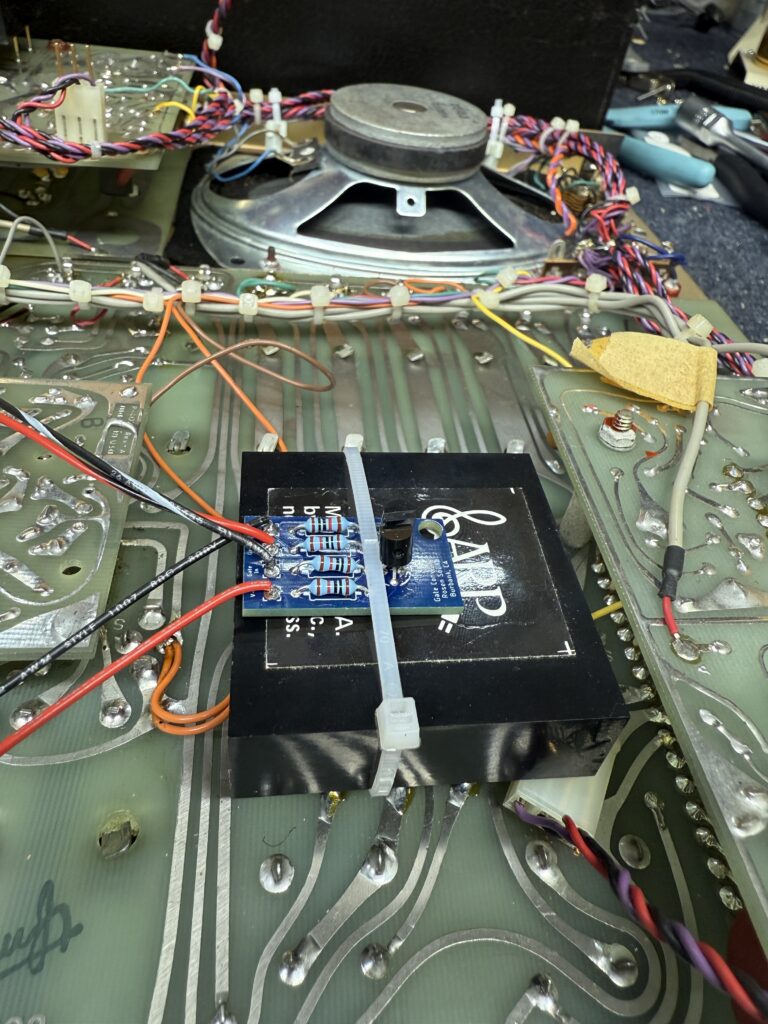
Photo above is how the chiclet can be mounted to a sub module with a zip tie. V+ goes to 15V and Gnd goes to ground. If you need that explained, you shouldn’t be installing this yourself. “Gate in” is the black/white wire you see above where I show the trace cut, and “gate out” is the red/black (looks just red in these photos) on the other side of the trace cut. This basically accomplished the goal of: all positive voltages going into this jack will be converted to ~15VDC through that little chiclet.
Errata
- Yes, it’s true you can accomplish the same goal from the first part of this mod by just unplugging the keyboard, but thats hardly a good solution depending on your setup. In my setup, the connector is too close to the wall and is in a custom case, so it’s quite inconvenient to remove it every time I want to externally control it. This also causes excessive wear to the connector.
- A better version of the CV end of this mod is to just add a summing node circuit inside the 2600 or better yet in your keyboard electronics. I will write another page about modding both versions of the keyboard this way. This is much more destructive, however. Being able to transpose the sequences is fun via the 2600 keyboard when you do it this way but if you have a droopy 3604 keyboard CV or a flaky cable, YMMV.
- Techs reading this may scoff at the idea of removing your very convenient probe point of the keyboard CV we use to calibrate it. Its just as easy to probe off the connector and only necessary when doing occasional calibration. If you need to calibrate it quickly, just calibrate the oscillators using an external 1V/Oct source (which is probably way more accurate than the 2600 keyboards) and then calibrate the 3604 fixed interval to match. Easy. For 3620, you’re deep in it anyway.. just probe off the exposed cinch connector. Also, we all know if you just don’t put the cable in all the way, you’ll likely get the needed voltage off of the jack still, albeit less reliably.